>>
30-MINUTE MEALS! Get the email series now →


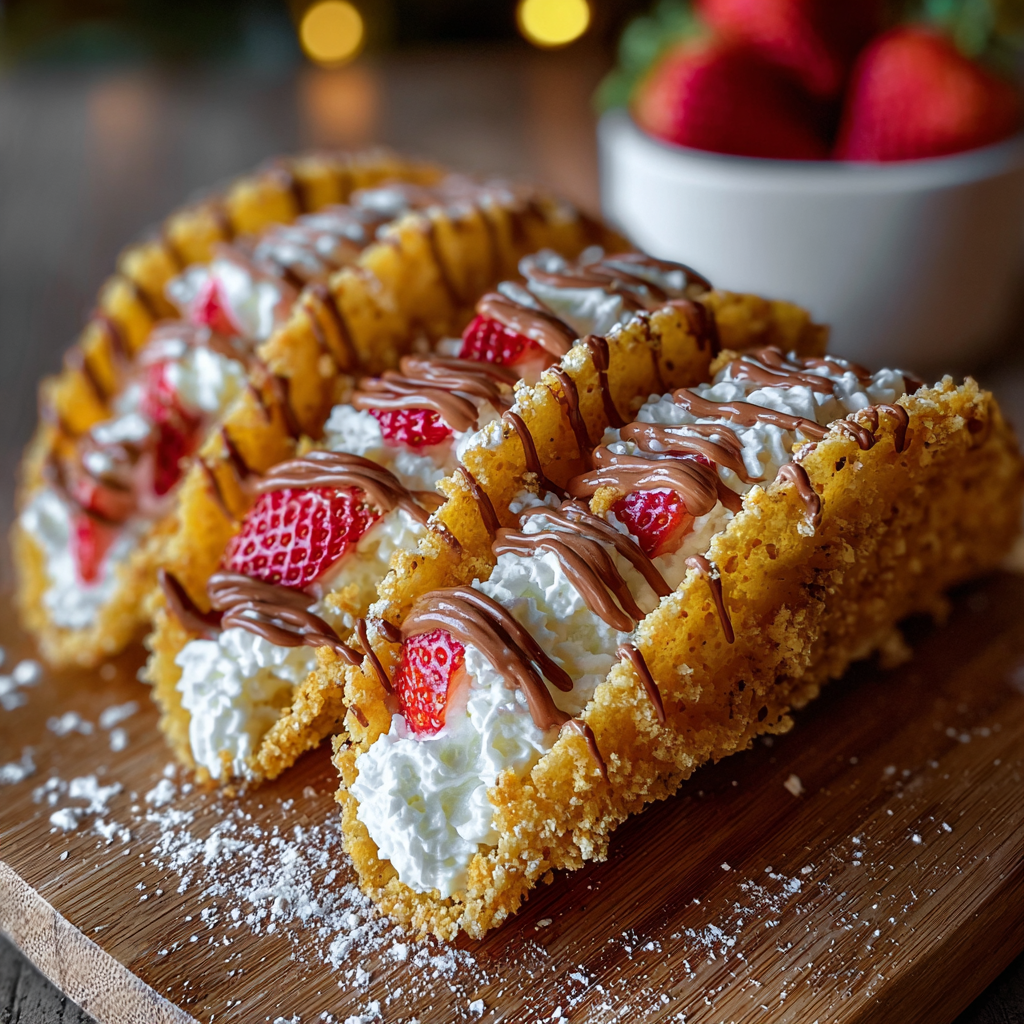
Flaky puff pastry hearts filled with a silky strawberry-tinted cream cheese and fresh berries — a quick, romantic treat perfect for breakfast, brunch, or dessert.

This little pastry has a permanent place in my weekend routine: flaky layers of puff pastry, a lightly sweetened cream cheese center tinted a soft pink, and bright fresh strawberries on top. I first made these on a chilly February morning when I wanted something special for a simple breakfast with my partner. The result was so cheerful and surprisingly easy that we started making them for birthdays, cozy brunches, and whenever we needed a tiny celebration. They look impressive but are genuinely approachable, which is why I love sharing them with friends.
What makes these especially memorable is the contrast of textures and flavors: the buttery, cloud-like pastry, the tang of cream cheese smoothed with vanilla and sugar, and the acidic pop of ripe strawberries. I usually reach for a familiar brand of puff pastry like Pepperidge Farm or Dufour when I want consistent results, and Philadelphia cream cheese gives the filling a silky finish. On busy mornings I keep thawed pastry on hand and make the filling in minutes; on leisurely weekends I use a piping bag and arrange the berries into little patterns. Either way, they disappear fast.
I remember the first time I served these at a small gathering — a friend asked for the recipe before dessert plates were even cleared. The simple presentation and bright color always draw a smile, and they’re a great way to stretch strawberries into something festive.

My favorite aspect is how personal you can make them: switch fruit, adjust sweetness, or pipe the filling into neat rosettes. I’ve handed these out at bake sales and watched people beam when they realize how simple they are to make. They call back to bakery mornings and small, intentional celebrations.

To preserve the best texture, cool completely before storing and place in a single layer or separated by parchment in an airtight container. Refrigerate for up to three days; reheat in a 325°F (160°C) oven for 5–8 minutes to refresh the crispness. For longer storage, freeze fully cooled pastries in a single layer on a baking sheet, then transfer to a freezer bag for up to two months. Thaw overnight in the refrigerator and re-crisp briefly in a warm oven. Avoid microwaving, which makes the pastry soggy.
For a dairy-free version, use a firm dairy-free cream cheese and a plant-based puff pastry; brands vary, so expect a slightly different mouthfeel. Substitute powdered sugar for granulated sugar in the filling for an extra-smooth texture; reduce liquid slightly if using very juicy berries. For a lower-sugar option, replace sugar with a granulated erythritol blend in a 1:1 ratio and taste for sweetness. If fresh strawberries aren’t available, use raspberries or thinly sliced stone fruit for seasonal variety.
These are delightful with a cup of strong coffee or a lightly brewed green tea. For brunch, serve alongside scrambled eggs and smoked salmon for a balanced spread. Garnish with a few mint leaves, a light dusting of powdered sugar, or a simple lemon zest on the glaze for brightness. They work beautifully on a dessert board with other small pastries and fresh fruit for a party presentation.
Flaky pastries filled with sweet cheese have long roots across Europe. The technique of layering butter into dough to create a puff is classic French and has been adapted into many regional specialties. The concept of combining sweetened cheese and fruit on tender pastries shows up in Scandinavian and Central European baking and has become a bakery staple in American cafes. This version simplifies those traditions for a home kitchen using store-bought pastry.
In spring and summer, use peak-season strawberries or mix strawberries with blueberries for color contrast. In autumn, swap strawberries for poached pears and add a pinch of warm spice to the filling. For winter holidays, fold a teaspoon of orange zest into the cream cheese and top with sugared cranberries. Adjust the sugar and fruit volume to account for the fruit’s natural sweetness and moisture.
Prepare the filling up to 48 hours in advance and keep it chilled in an airtight container. Cut the pastry and score or press the borders, then cover and refrigerate for several hours before assembly to keep the pastry cold. Right before baking, fill, top with fruit, brush with egg wash, and bake. This approach saves time on busy mornings while preserving bakery-fresh results.
These heart-shaped pastries are a simple way to make everyday moments feel special. Whether you’re baking for someone you love or treating yourself, they’re approachable, adaptable, and always a little bit joyful. Try them once, and you’ll find reasons to make them again.
Keep the pastry cold before baking to ensure maximum puff and flaky layers.
If the filling seems too loose, chill it for 10–15 minutes before filling the pastry to firm it slightly.
Use a piping bag to fill the hearts cleanly and avoid getting filling on the pastry edges.
Rotate the baking sheet halfway through baking for even coloring if your oven has hot spots.
To refresh crispness, reheat at 325°F for 5–8 minutes rather than microwaving.
This nourishing strawberry cream cheese heart danishes recipe is sure to be a staple in your kitchen. Enjoy every moist, high protein slice — it is perfect for breakfast or as a wholesome snack any time.
This Strawberry Cream Cheese Heart Danishes recipe makes perfectly juicy, tender, and flavorful steak every time! Serve with potatoes and a side salad for an unforgettable dinner in under 30 minutes.
Thaw the puff pastry following package directions until flexible but still cool. Preheat the oven to 400°F (200°C). Line a large baking sheet with parchment paper.
Beat 4 ounces room-temperature cream cheese with 2 tablespoons sugar and 1/2 teaspoon vanilla until smooth. Add a tiny drop of red food coloring if tinting, and fold in half of the diced strawberries if desired.
On a lightly floured surface, roll the pastry gently and cut 3–4 inch hearts. Create a raised border by pressing a smaller cutter into the center or scoring a 1/2-inch border without cutting through.
Spoon or pipe 1–2 tablespoons of filling into each heart, top with remaining strawberries, and avoid overfilling to prevent leakage during baking.
Whisk 1 large egg with 1 tablespoon cold water and lightly brush the pastry edges. Bake for 12–15 minutes at 400°F until golden and puffed. Rotate the pan halfway for even coloring.
Let cool for a few minutes on the baking sheet, transfer to a wire rack, then dust with powdered sugar or drizzle a glaze made from 1/2 cup powdered sugar and 1–2 tablespoons milk.
Last Step: Please leave a rating and comment letting us know how you liked this recipe! This helps our business to thrive and continue providing free, high-quality recipes for you.
Leave a comment & rating below or tag
@mrcooks on social media!
A playful holiday dessert: crisp white chocolate–lined tortilla shells filled with a light, whipped cream cheese filling and finished with graham crumbs, sprinkles and crushed candy cane.

Buttery peanut butter meets crisp cereal and a silky chocolate swirl for an irresistible, easy-to-make bar that everyone will ask for again.
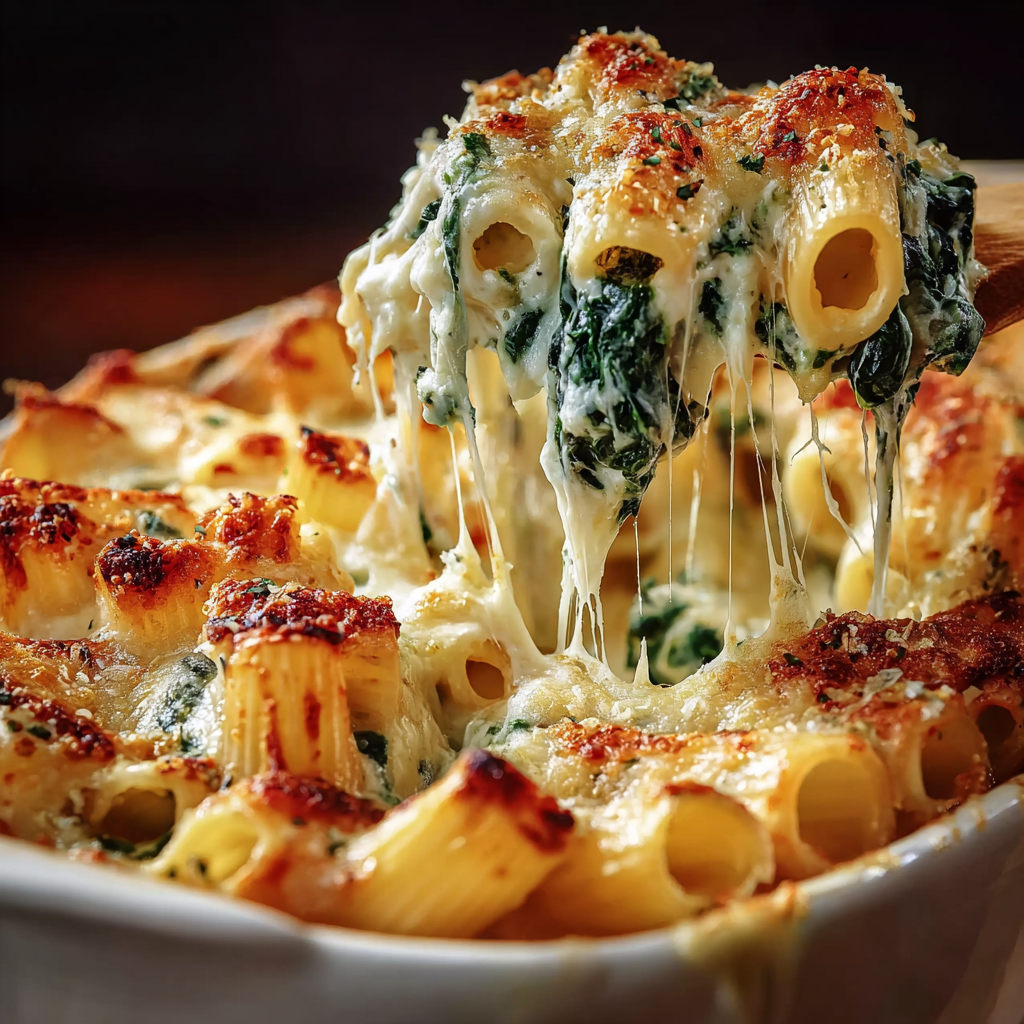
A creamy spinach and ricotta pasta bake topped with bubbling mozzarella and a bright tomato sauce. Simple pantry ingredients come together for a comforting yet elegant family meal.
Leave a comment & rating below or tag @mrcooks on social media!
Enjoyed this recipe? Share it with friends and family, and don't forget to leave a review!
This recipe looks amazing! Can't wait to try it.
Comments are stored locally in your browser. Server comments are displayed alongside your local comments.

Join to receive our email series which contains a round-up of some of our quick and easy family favorite recipes.