Eggs in Crispy Hash Brown Baskets

Crispy potato nests filled with baked eggs and melty cheese make a versatile breakfast or dinner that is quick, crowd pleasing, and easy to customize.

This recipe for eggs in crispy hash brown baskets started as a lazy weekend experiment and quickly became one of my favorite ways to turn simple ingredients into something special. I remember the first time I tried it on a rainy Saturday morning when the fridge held only shredded potatoes and a handful of eggs. The result was golden, crunchy potato cups with a soft baked egg in the center that tasted like comfort and celebration at once. It is the kind of dish that makes everyone at the table smile, from the kids who love scooping out the yolk to guests who appreciate the elegant presentation.
The texture combination is what keeps me coming back. The outer edges become deeply crisp while the interior stays tender enough to cradle a perfectly set egg. Cheese folded into the potato adds toasty flavor and helps the cups hold their shape, while optional add ins like bacon or sautéed peppers build layers of savory interest. I often make a double batch for brunch gatherings, and the baskets reheat beautifully, which makes them ideal for busy mornings or relaxed dinners shared with friends.
Why You'll Love This Recipe
- Ready in about 40 minutes from start to finish, making it a great option for leisurely weekends or quick weeknight dinners when you want something special.
- Uses pantry and fridge staples like shredded potatoes, eggs, and cheese, so you can usually make it without a special shopping trip.
- Highly customizable with mix ins such as cooked bacon, breakfast sausage, spinach, or bell peppers, so the dish fits many tastes and dietary preferences.
- Make ahead friendly, since you can prebake the baskets and finish with eggs when you are ready to serve, saving time on busy mornings.
- Single serving presentation makes it perfect for parties, brunch spreads, or portion controlled meals, and it freezes well for up to three months if you want to batch prep.
Every time I serve these, family members remark on the crisp edges and creamy yolk. I learned that squeezing the moisture from thawed potatoes and using a little fat are the small steps that make a big difference in texture. Guests often ask for the method so they can replicate the crispiness at home, and I love that this technique is so forgiving yet reliably delicious.
Ingredients
- Shredded potatoes: Use 2 cups of fresh shredded potatoes, or 2 cups of thawed frozen shredded potatoes. When shopping look for russet or Yukon Gold for better texture. Pat them dry with paper towels to remove excess moisture so the cups get crisp.
- Shredded cheese: 1 cup shredded cheddar, mozzarella, or a blend. Cheddar gives sharp flavor and helps the edges brown. If shredding your own, a medium box grater works best.
- Large eggs: 6 large eggs, one for each cup. Use room temperature eggs for even baking and more predictable set times.
- Olive oil or melted butter: 2 tablespoons total. Olive oil produces a light crisp, butter gives a richer flavor. Either helps conduct heat for a golden crust.
- Salt and pepper: To taste. I recommend 1 teaspoon of salt and 1/4 teaspoon of black pepper for the whole batch, then adjust when adding eggs.
- Optional mix ins: Diced cooked bacon or sausage, chopped spinach, diced bell peppers, and seasonings such as paprika, onion powder, or garlic powder. Add cooked meats and wilted greens in moderation so the cups hold together.
Instructions
Prep the potatoes and equipment:Preheat the oven to 400 degrees F. If using frozen potatoes, thaw completely and wrap them in paper towels or a clean kitchen towel, then squeeze firmly to remove as much liquid as possible. Dry potatoes crisp better, so press until mostly dry. Grease a 12 cup muffin tin with non stick spray or brush each cup with a little oil or melted butter.Season and combine:In a large mixing bowl, toss the drained shredded potatoes with 2 tablespoons of olive oil or melted butter, 1 cup shredded cheese, and salt and pepper. If using paprika, onion powder, or garlic powder, add about 1/4 teaspoon of each now. Stir until the potatoes are evenly coated and the cheese is distributed.Form the nests:Spoon equal portions of the potato mixture into each muffin cup. Press the potatoes up the sides of each cup to form a nest or basket, leaving a cavity in the center for the egg. Firmly compacting the sides helps the cups maintain shape during baking. Use about 1/3 to 1/2 cup of mixture per cup depending on how thick you want the walls.Pre bake the baskets:Bake at 400 degrees F for 15 to 20 minutes until the edges show golden brown color and the surface feels set. Rotate the pan halfway through baking for even color. The goal is to have crisp edges while the interior remains slightly tender to accept the egg without collapsing.Add eggs carefully:Remove the pan from the oven and gently crack one room temperature egg into the center of each potato basket. If you prefer scrambled eggs, whisk them first and divide evenly. Season each egg with a small pinch of salt and pepper and return the pan to the oven.Finish baking to desired doneness:Return to the oven and bake 10 to 12 minutes for mostly set whites and a slightly runny yolk. For firmer yolks bake up to 13 minutes. Check at 8 to 10 minutes if you like very soft yolks and remember ovens vary. Let the cups rest 2 minutes before removing to let carryover heat finish setting the eggs.
You Must Know
- This makes 6 baskets and keeps in the refrigerator for up to 3 days. Reheat at 350 degrees F for 8 to 10 minutes to restore crispness.
- High in protein and moderately high in fat due to cheese and eggs, each serving is about 225 calories, 9 grams carbohydrates, 16 grams fat, and 12 grams protein.
- Freezes well if prebaked without eggs. Freeze the empty baskets in a single layer, then store in a freezer bag for up to three months. Add eggs and finish baking from frozen by increasing final bake time slightly.
- Drying the potatoes thoroughly is the single most important step to achieve crunchy edges. If potatoes are wet, cups will be soggy and fall apart.
My favorite part is watching people break into the yolk and dip a piece of crispy potato into the golden center. It brings back memories of casual brunches where everyone serves themselves and the conversation lingers. I often add a sprinkle of chopped chives and a dash of hot sauce for a final bright note that leaves guests asking for the recipe.

Storage Tips
To store, cool the baskets completely and transfer to an airtight container. Refrigerate up to 3 days. For longer storage prebake the potato cups without eggs and cool fully before freezing on a sheet pan. Once frozen transfer to freezer bags and label with date. To reheat refrigerated cups, bake at 350 degrees F for 8 to 10 minutes. If reheating from frozen, bake at 375 degrees F for 12 to 18 minutes, then add an egg and finish for 8 to 12 minutes if desired.
Ingredient Substitutions
If you need dairy free, omit cheese or use a plant based shredded alternative, and swap butter for extra olive oil. For a lower sodium option, choose unsalted butter and reduce added salt. If you cannot find shredded potatoes, roughly grate one medium russet potato and squeeze dry. For a gluten free ready made option, ensure any packaged hash browns are labeled gluten free. To lighten the dish, use 3 egg whites and 3 whole eggs while keeping the same total egg volume.
Serving Suggestions
Serve warm with a crisp green salad and a simple citrus vinaigrette for contrast. Top with sliced avocado after baking, or add a dollop of sour cream or Greek yogurt and chopped chives. For a brunch platter offer lemony arugula, roasted tomatoes, and warm crusty bread. These baskets also pair well with roasted vegetables or a soup for an easy weeknight dinner.
Cultural Background
Potato and egg combinations are common across many kitchens because they combine humble ingredients into satisfying meals. The idea of baking eggs in a cup or shell appears in various forms from British kedgeree variations to Spanish tortilla cups. This particular presentation blends classic home style hash browns with individual baked eggs, offering a modern, shareable way to enjoy breakfast flavors at any meal.
Seasonal Adaptations
Customize seasonally by folding in spring greens and peas in the spring, roasted squash and sage in autumn, or smoked salmon and dill in winter. In summer highlight sweet bell peppers and fresh herbs, and reduce oven time slightly if using very tender new potatoes. For holiday brunch add a pinch of nutmeg to the cheese mixture for warmth, and finish with flaked sea salt for a festive touch.
Meal Prep Tips
Prebake the potato cups and store them refrigerated for up to 3 days so on busy mornings you only need to add eggs and finish baking. Keep cooked add ins such as bacon or sautéed vegetables separate until final assembly to avoid soggy cups. For batch baking, use two muffin tins and rotate pans in the oven for consistent browning. Label containers with reheating instructions to make leftovers effortless to enjoy.
These simple nests are one of those recipes that feel special yet remain homey. They are an invitation to experiment with flavors, and I hope you enjoy making them part of your breakfast or dinner rotation.
Pro Tips
Squeeze as much moisture from thawed or fresh shredded potatoes as possible using paper towels to ensure crisp edges.
Use room temperature eggs so they bake evenly and reach doneness at the same time as the potato cups.
Prebake the cups until edges are golden, then add eggs and finish baking to avoid undercooked potatoes or overcooked eggs.
Brush the muffin cups with oil to help release the baskets cleanly and to aid browning.
If using cooked meat add it sparingly so the basket walls remain structurally sound.
This nourishing eggs in crispy hash brown baskets recipe is sure to be a staple in your kitchen. Enjoy every moist, high protein slice — it is perfect for breakfast or as a wholesome snack any time.
FAQs about Recipes
Can I freeze these?
Yes. Prebake the baskets without eggs, cool, freeze in a single layer until solid, then transfer to a freezer bag. Freeze up to three months. Finish by adding eggs and baking from frozen, increasing time by a few minutes.
How do I get runny yolks?
Use room temperature eggs for more consistent baking. If you prefer runny yolks check at 8 to 10 minutes and remove when whites are set but yolks jiggle slightly.
Tags
Eggs in Crispy Hash Brown Baskets
This Eggs in Crispy Hash Brown Baskets recipe makes perfectly juicy, tender, and flavorful steak every time! Serve with potatoes and a side salad for an unforgettable dinner in under 30 minutes.
Ingredients
Main
Optional add ins
Instructions
Prep the potatoes and oven
Preheat oven to 400 degrees F. Thaw frozen potatoes if using then wrap in paper towels and squeeze out as much moisture as possible. Grease a 12 cup muffin tin with oil or butter.
Season and mix
In a bowl combine the dried shredded potatoes with 2 tablespoons olive oil or melted butter, 1 cup shredded cheese, salt, pepper and optional seasonings. Mix until evenly coated.
Form the baskets
Press portions of the potato mixture into each muffin cup, pushing up the sides to create a cavity for the egg. Firmly compact the sides so the baskets hold their shape when baked.
Pre bake the nests
Bake at 400 degrees F for 15 to 20 minutes until edges are golden and crisp. Rotate the pan once for even browning.
Add eggs
Remove the pan and gently crack one egg into the center of each basket. Season lightly with salt and pepper and return to the oven.
Finish baking
Bake 10 to 12 minutes for a mostly set white and slightly runny yolk. For firmer yolks bake up to 13 minutes. Let rest 2 minutes before removing from the tin.
Serve
Gently loosen baskets from the tin with a small spatula and serve warm with optional toppings such as avocado, chives, or hot sauce.
Last Step: Please leave a rating and comment letting us know how you liked this recipe! This helps our business to thrive and continue providing free, high-quality recipes for you.
Nutrition
Did You Make This?
Leave a comment & rating below or tag
@mrcooks on social media!
Categories:
You might also like...

Cheesecake Tacos
A playful holiday dessert: crisp white chocolate–lined tortilla shells filled with a light, whipped cream cheese filling and finished with graham crumbs, sprinkles and crushed candy cane.

Peanut Butter Rice Krispie Treats with Chocolate Swirl
Buttery peanut butter meets crisp cereal and a silky chocolate swirl for an irresistible, easy-to-make bar that everyone will ask for again.
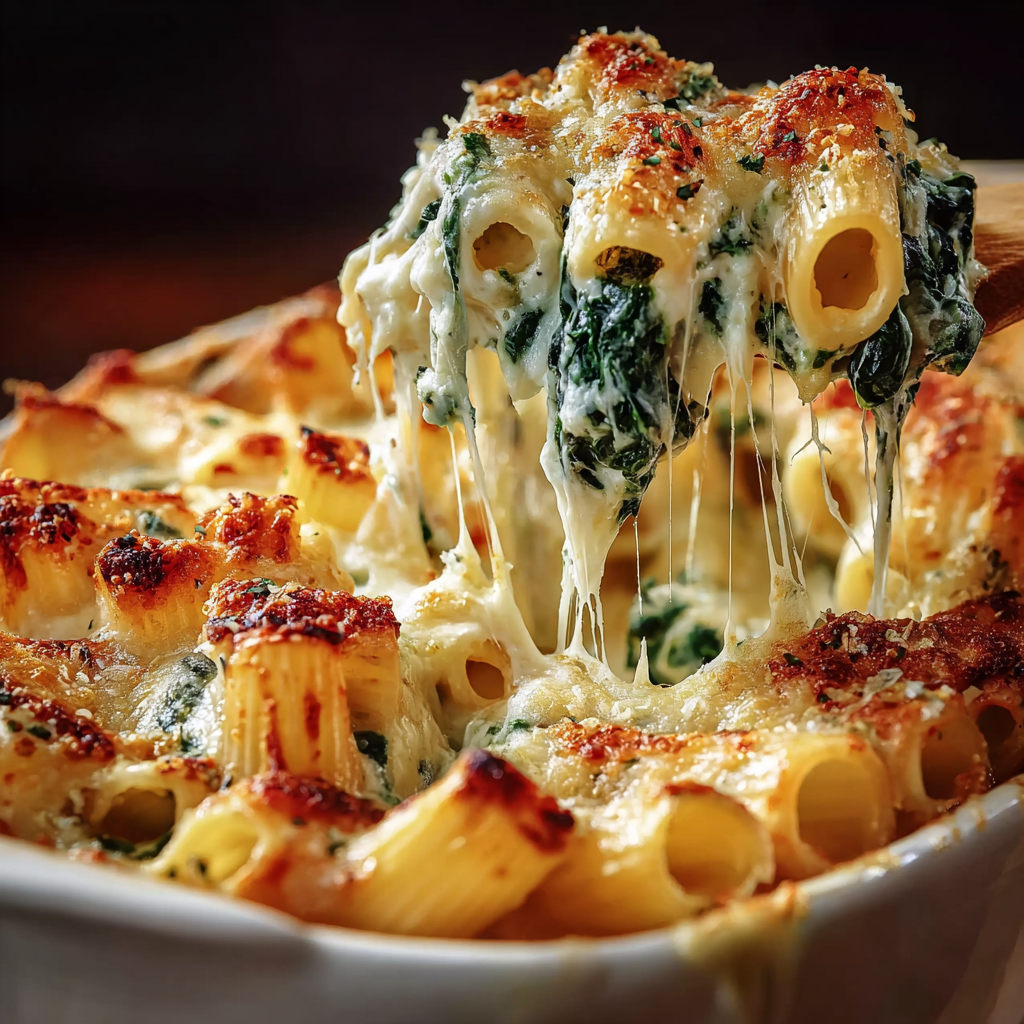
Indulgent Spinach Ricotta Pasta Bake Ready in 30 Minutes!
A creamy spinach and ricotta pasta bake topped with bubbling mozzarella and a bright tomato sauce. Simple pantry ingredients come together for a comforting yet elegant family meal.
Did You Make This?
Leave a comment & rating below or tag @mrcooks on social media!
Rate This Recipe
Share This Recipe
Enjoyed this recipe? Share it with friends and family, and don't forget to leave a review!
Comments (1)
This recipe looks amazing! Can't wait to try it.
Comments are stored locally in your browser. Server comments are displayed alongside your local comments.

Hi, I'm Mr.!
What's Popular
30-Minute Meals!
Join to receive our email series which contains a round-up of some of our quick and easy family favorite recipes.